Understand
This section describes how to create an AD project and analyze it.
Create AD Project
You can create a new AD project by following these steps:
- Open IBM Application Discovery Build Client. Then, click the new project icon, or click File > New Project from the upper left corner.
- Project type: Mainframe main languages -> Next
- Enter Project Name
- Select Project DB Type (Microsoft SQL Server)
- Select your SQL Server Installation
- Click Next -> Finish
- After the project is successfully created, you need to add some source code files. For this check, the source code is mostly irrelevant as long as
it’s one of the supported languages by AD. Sample source code can be provided by IBM for this particular check.
note
Working with AD connect is optional. Choose the next appropriate instructions accordingly.
Adding source code files
After you create a project, add source code files to retrieve data for further analysis.
For Non-AD Connect users ( Pilots )
After you create a sample project, you can follow these steps to add source code files and build the project.
-
Expand Sample Project, right-click the appropriate logical folder, and select Add Files to navigate to the location where you already prepared source code files. Then, select the appropriate ones, and click Ok. Repeat this action for all the appropriate logical folders. After the files are added to the logical folder or folders, click Save project icon in the top left corner.
-
Compile the added source code to collect all the necessary data that is needed for AD Analyze Client. You can click the Build Project icon in the top left corner.

-
When you are prompted to use the Check Project feature, select no, and proceed to build the project. Now, the full build process is started. The time that is needed for the build process depends on the added source code files. You can track the process in the output log window from the bottom part of the application interface. After the build is finished, a summary of the action is presented in the log output window.
Post processing actions are automatically triggered after the build process is finished. By using sample source code, the process will complete in five minutes. These are fully automated, and no user intervention is needed. For more information about checking the status of your created project, see Monitoring the statuses of the components and projects
For AD Connect users ( Mainframe Sourced Files )
If you have installed AD Connect, you can follow these steps to add source code files from mainframe by using AD Build Client.
- Proceed to open IBM Application Discovery Build Configuration. You can see the AD project that is created in AD Build Client.
- Switch to the zOS tab, right-click zOS Connection, and click Create zOS Connection.
- Add your connection name, the hostname (host of the z/OS where AD Connect is installed and configured), and the port that is opened for AD connect on Mainframe. For more information on AD Connect, see Installing IBM AD Connect for Mainframe.
- Click Test Connection to check whether the connection between Mainframe AD Connect and the endpoint that you are creating works or not. After the test is successful, click Save.
- Return to Projects section. From the right-click menu, select Associate zOS, then select the connection that you just created.
- After the zOS connection is attached to the project, right-click the attached connection, and select Configure Connection. In the section of Files and Libraries, add the zOS PDS Library name or names where the source code files are ready for a demonstration (For example, COBOL Programs along with copybooks). Then, save changes.
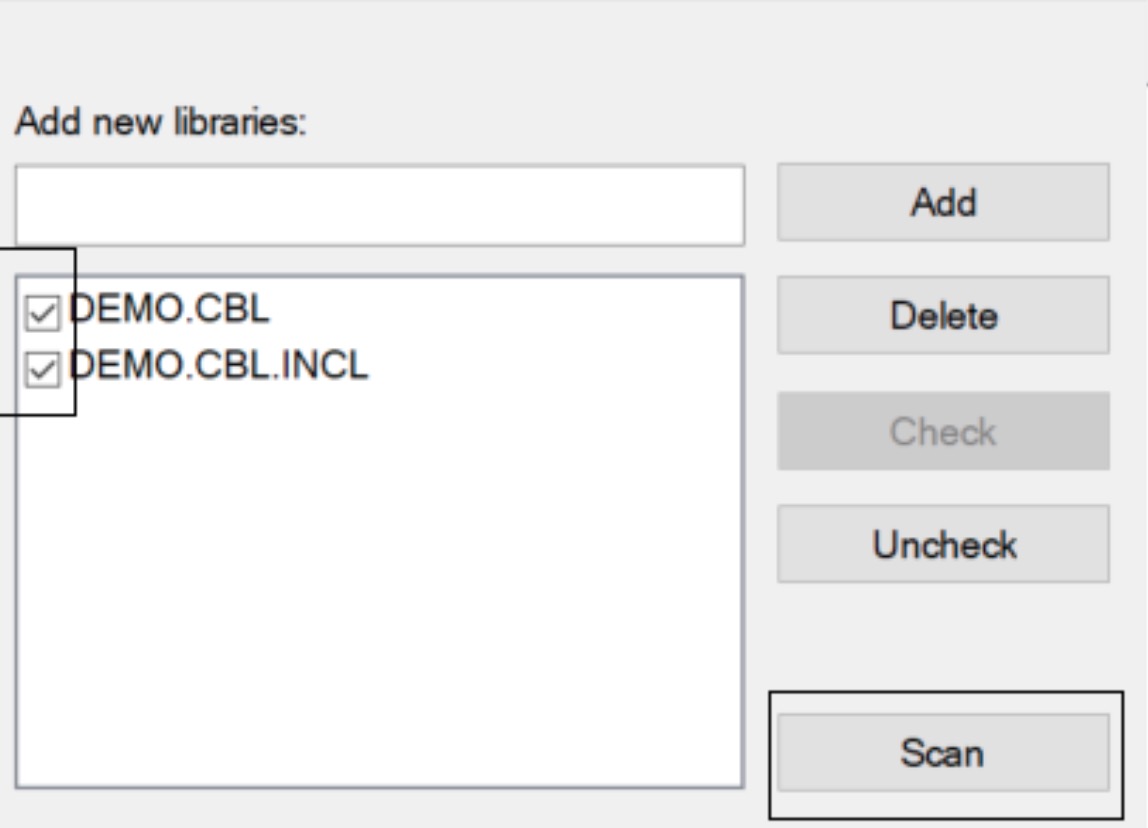
- Right-click the attached zOS Connection and select Retrieve source code information. Then, select PDS Libraries, and click Scan. The chosen PDS
Libraries will be scanned on Mainframe and information about the content will be added to the Sample Project Database.
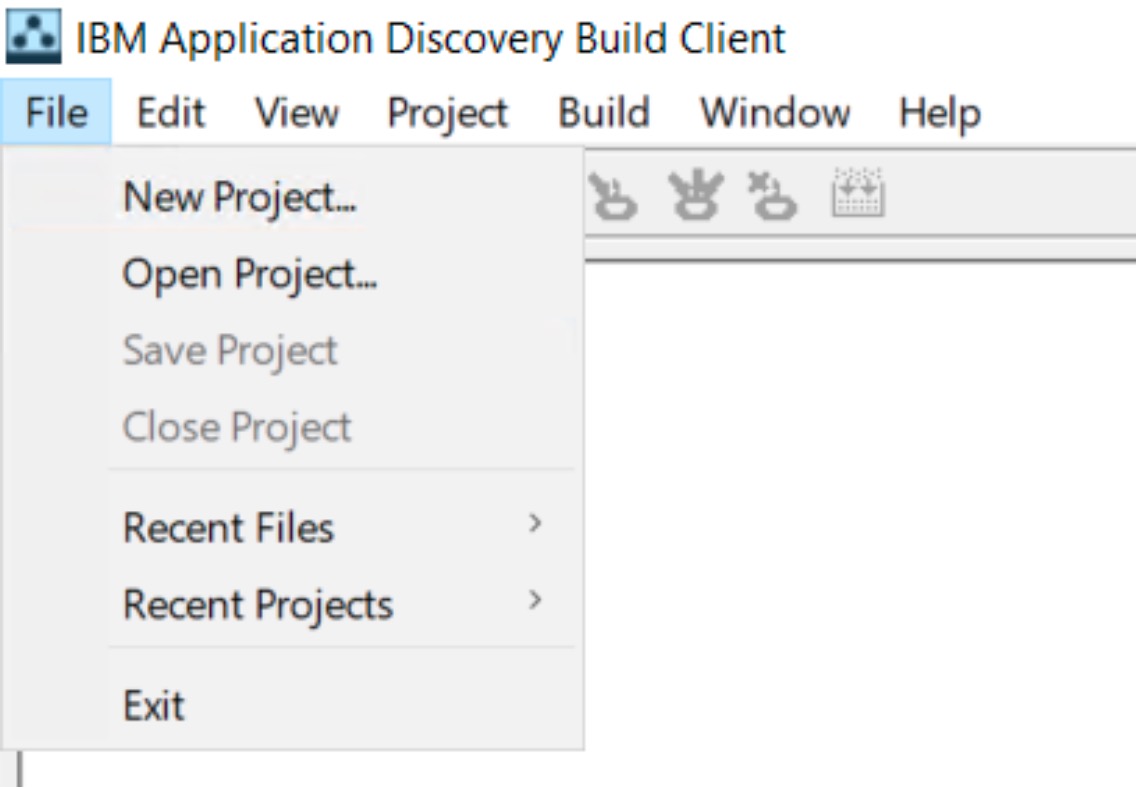
- Return to AD Build Client and open the Sample Project by clicking the Open Project action button or clicking File > Open Project.
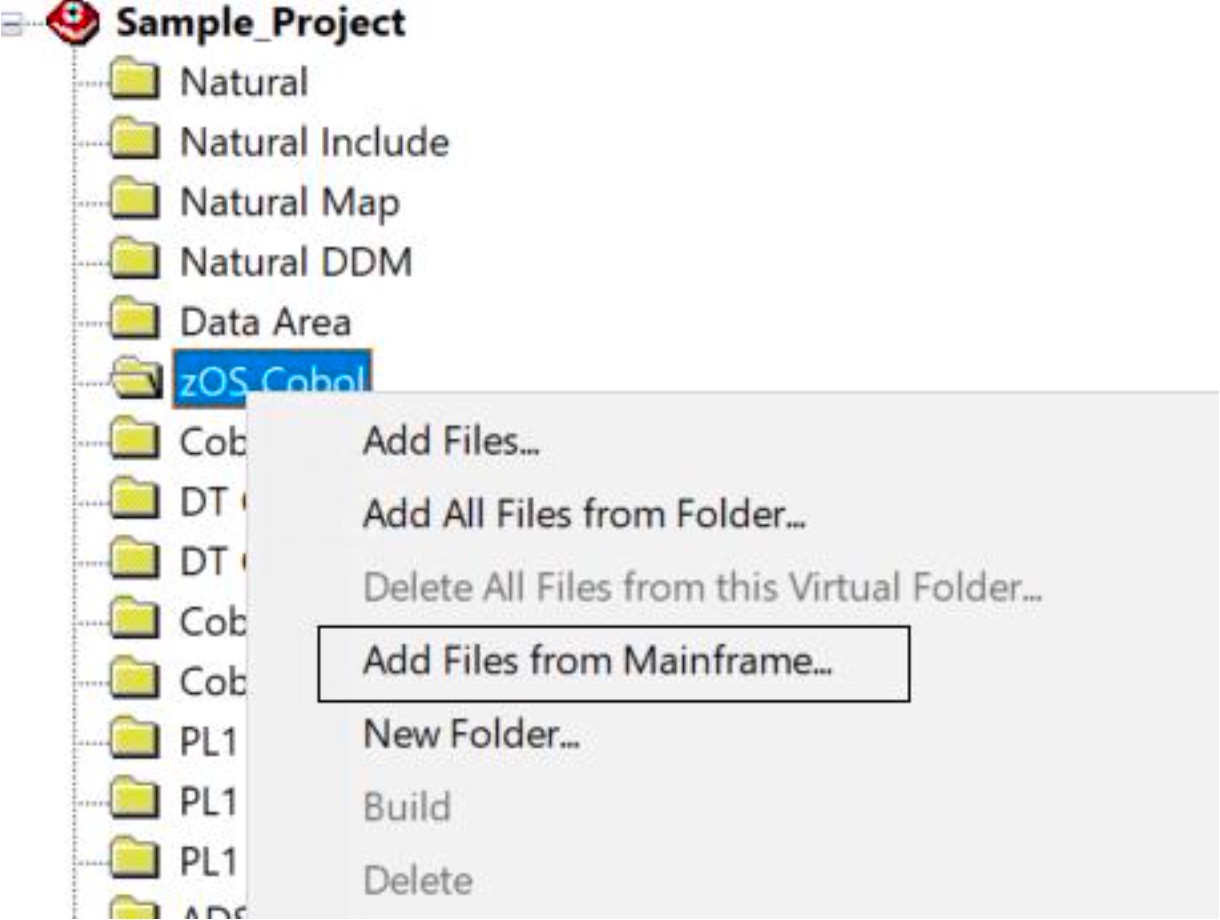
- Retrieve the source code files that were scanned at step 7. Expand Sample Project, select an appropriate logical folder, right-click the folder, and
select Add Files from Mainframe.
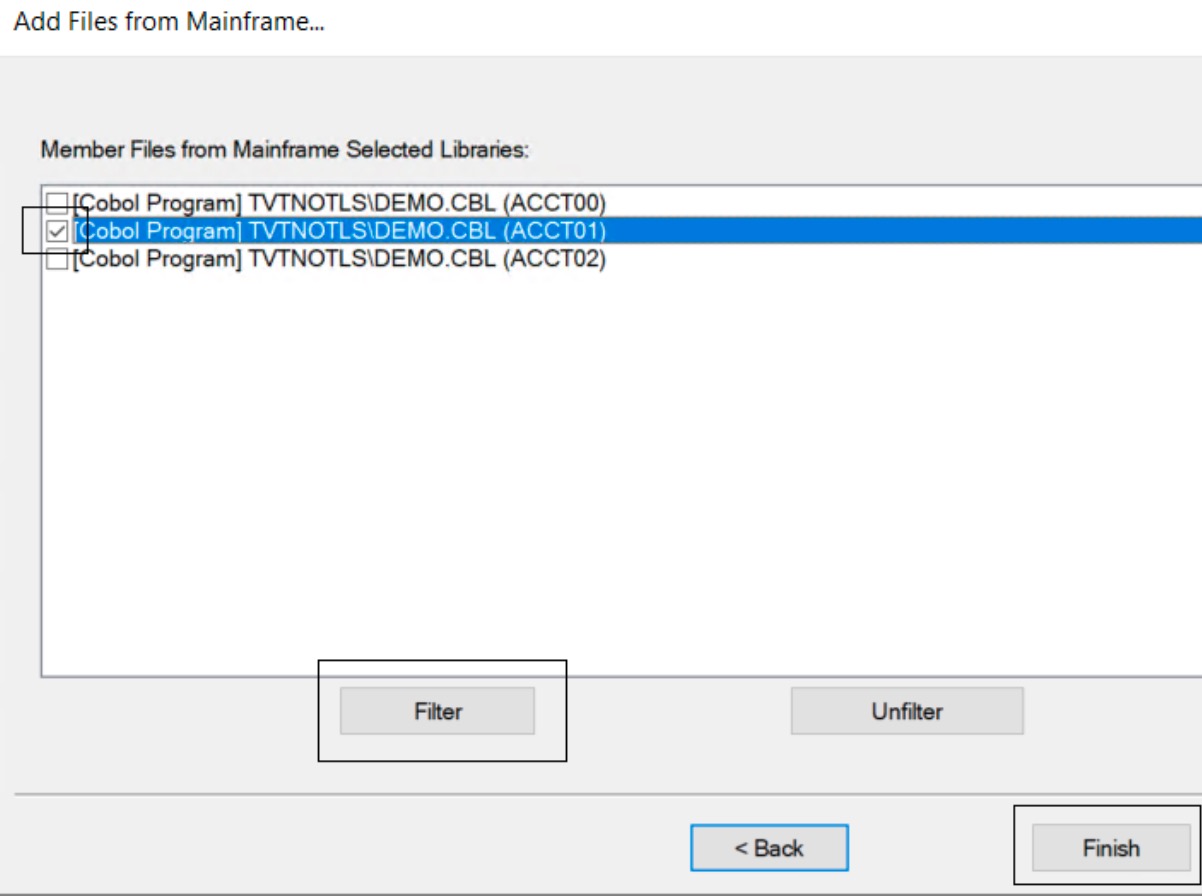
- In the pop-up window, select Add by libraries, and you can see the library or libraries that were scanned. Then click Next and select the source code
files that you need to retrieve. You can click the Filter button to filter the files. Finally, click Finish to start to retrieve the source code files.
 info
infoFor each logical folder where you need to retrieve source code files, you can follow this step. After all source code files that you need are retrieved and automatically added in the logical folders, click Save project icon in the top left corner.
Checking Analysis Feature
You can check the analysis feature by following these steps:
- Open IBM Developer for z/OS (IDz or IDz EE) and select Application Discovery Browser Perspective.
- Not seeing any projects? You may need to configure your environment settings.
- Select Window -> Preferences -> Application Discovery -> Environment Settings
- Gather these details
- Windows Fully Qualified Domain Name
- ADDI Server Port ( 2181 without TLS/SSL setup, 2281 once TLS/SSL is set up )
- Unique ID - Gather this ID from the ADDI Dashboard
- Name - ADDI Workspace name, from the ADDI Dashboard
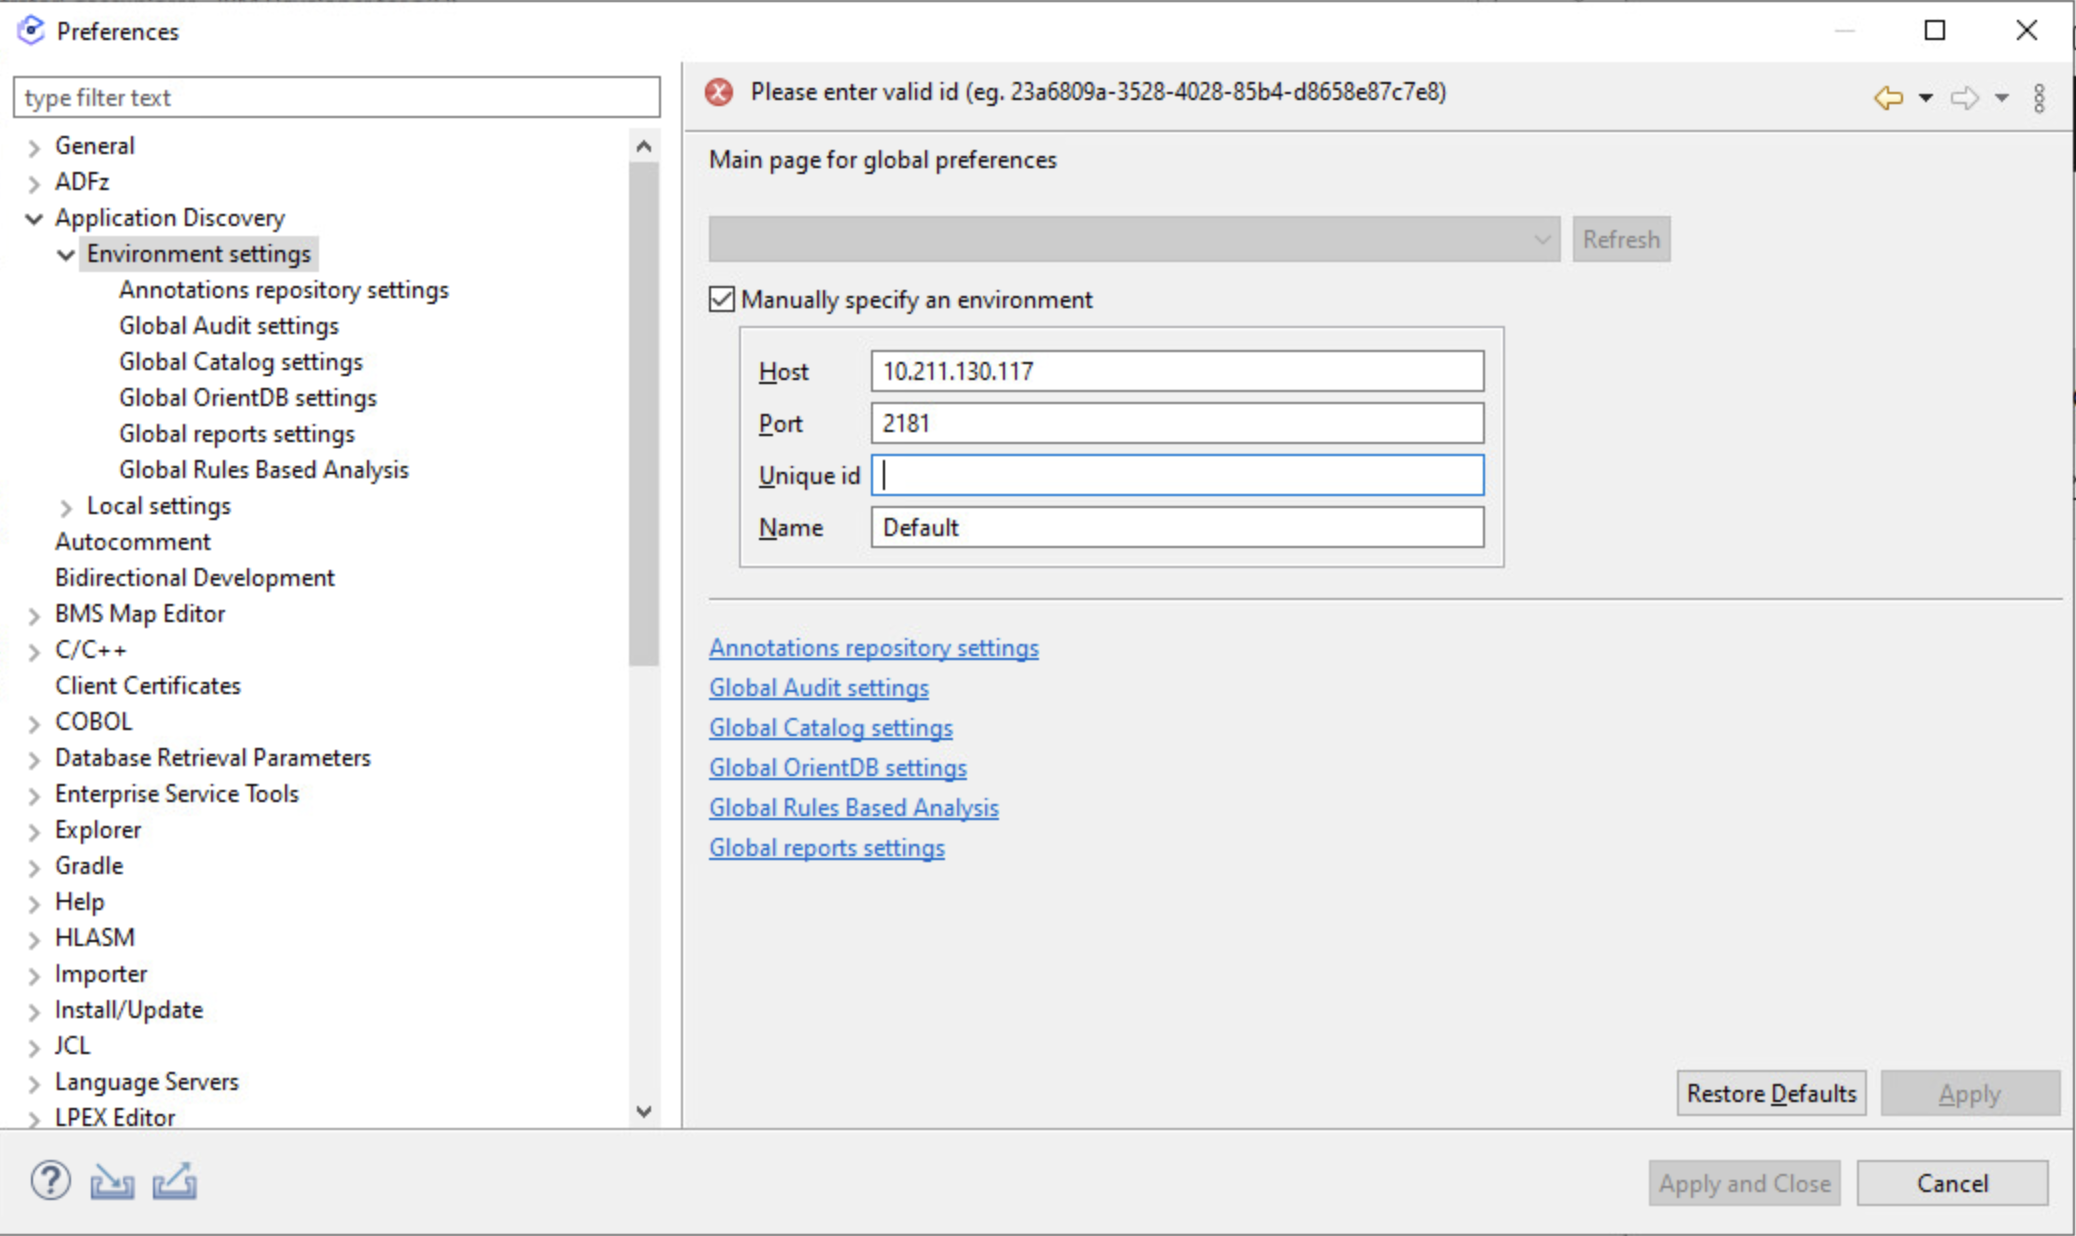
- Once you fill these details in, click apply. Then restart IDz
- Right-click in the Project column and select Get project list. In the Explore projects section, you can find the sample project. Click the project,
and available analysis will be displayed.
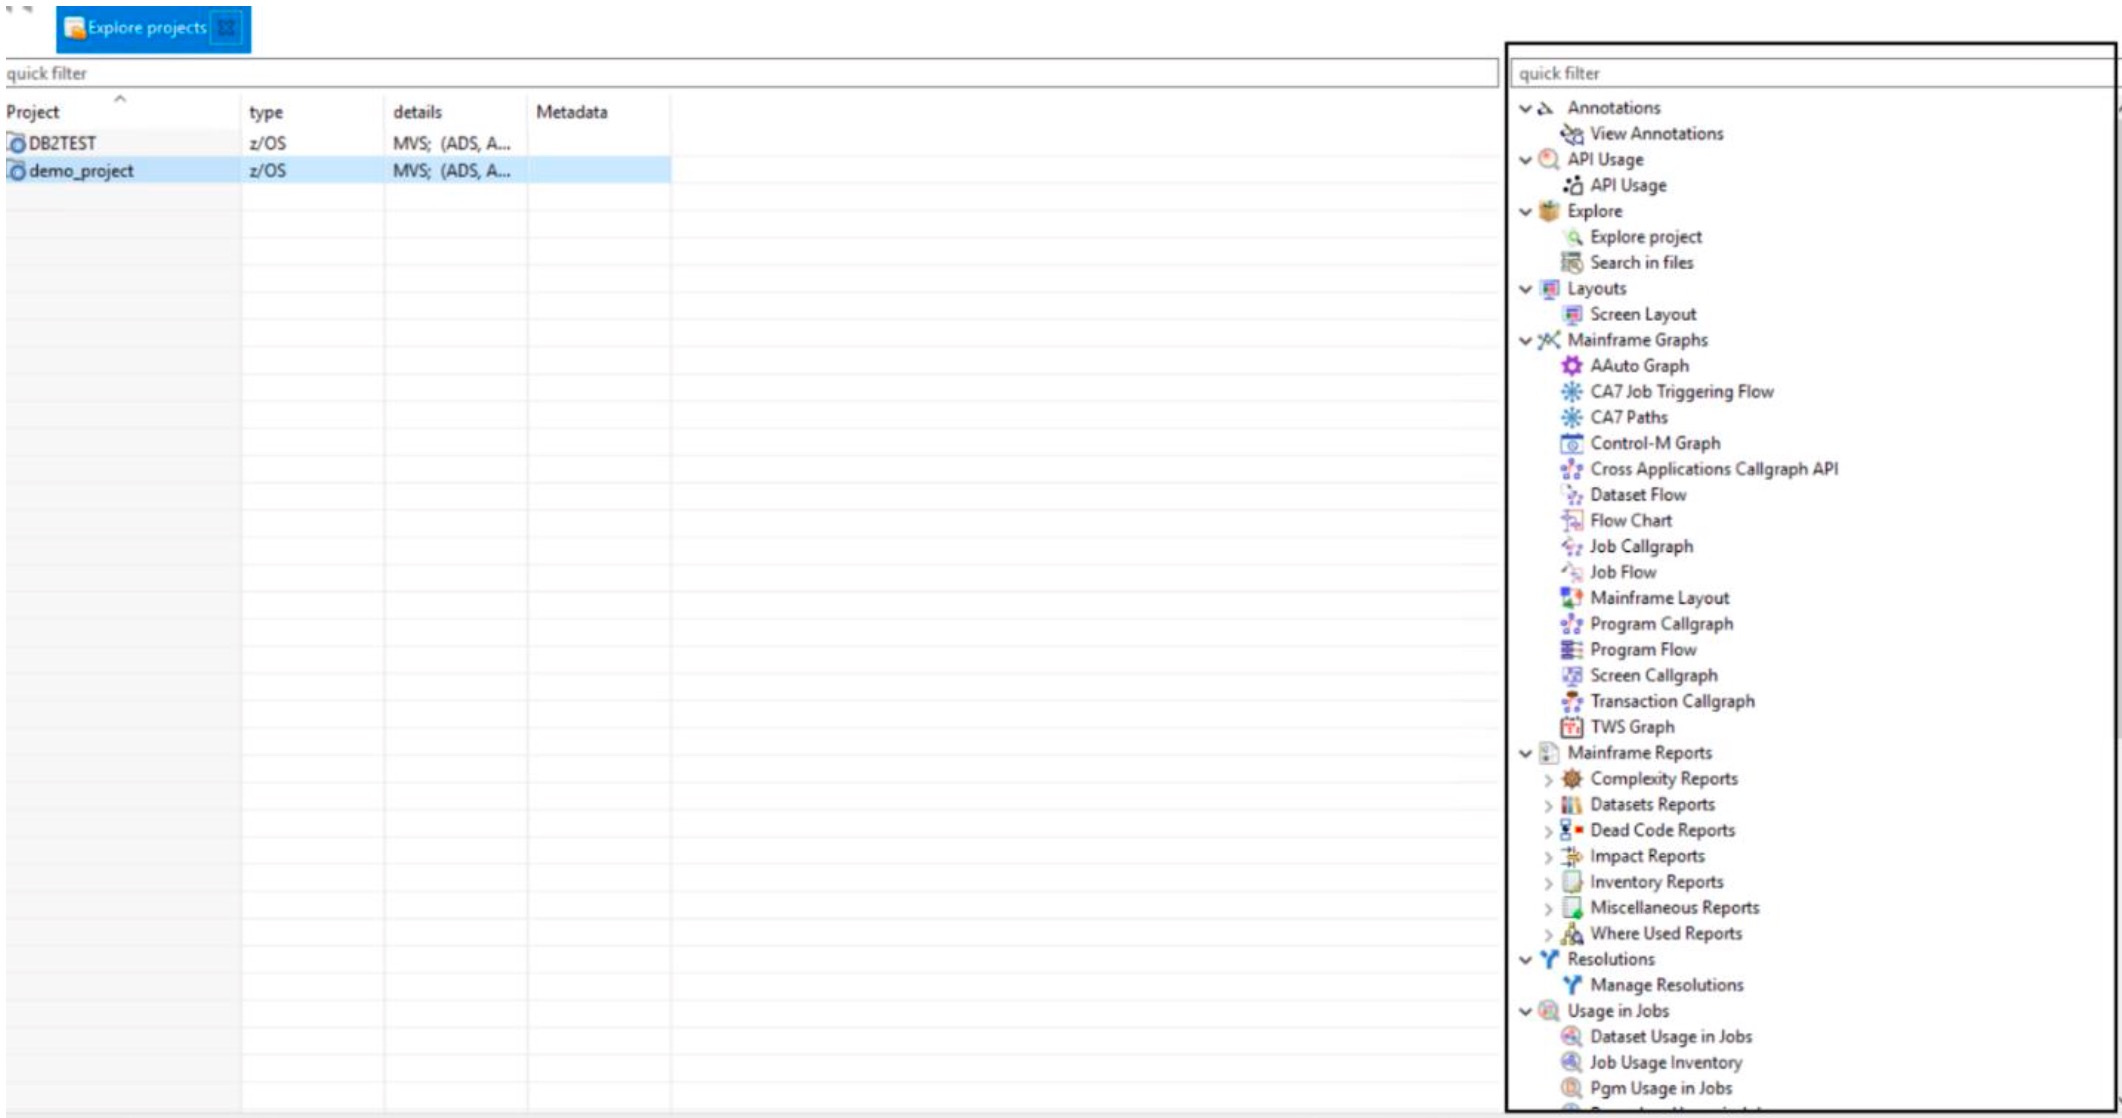
- Double-click Program Callgraph, proceed to pick one or more of the available programs in the list, and click Finish.
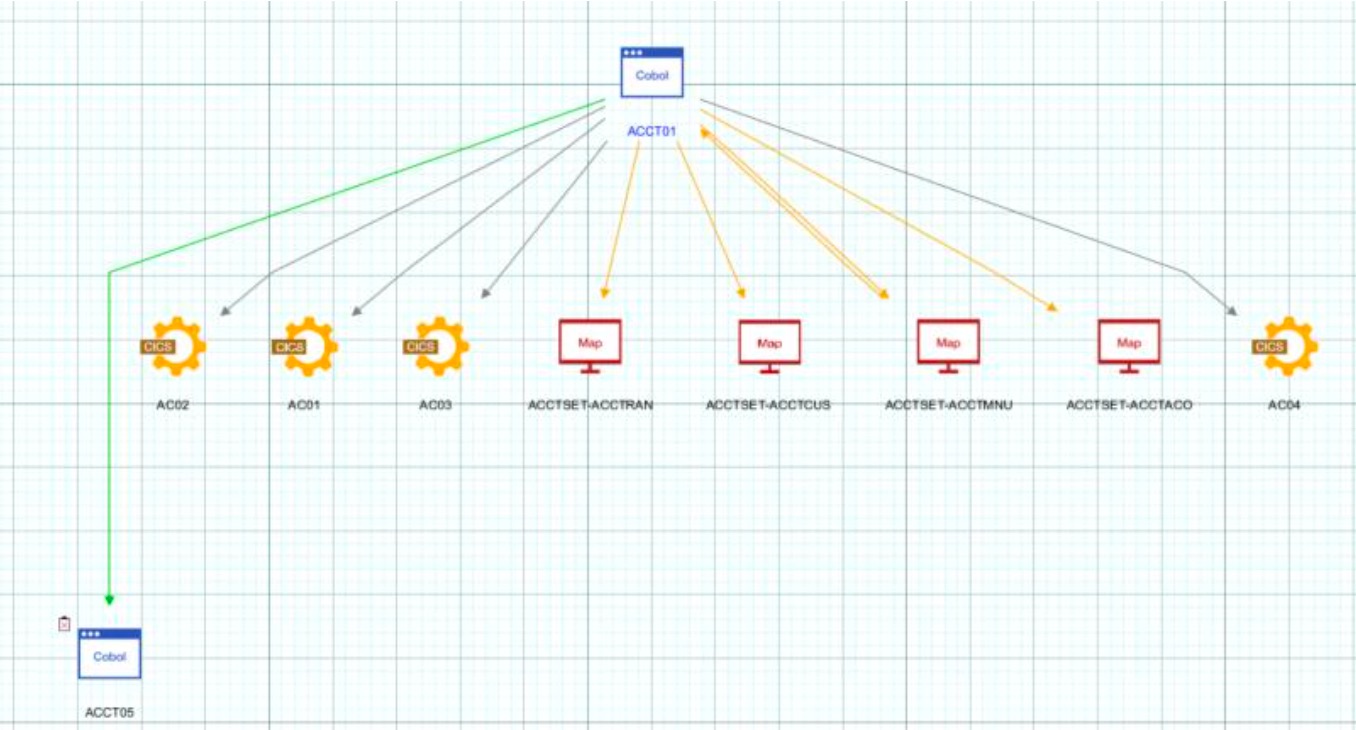
- After the Program Callgraph is successfully displayed, return to the Explore > Explore projects section. Click the sample project, expand Mainframe
Reports > Inventory Reports in the analysis list, and double-click Programs Inventory. Then, select a random program or programs, and click Finish.
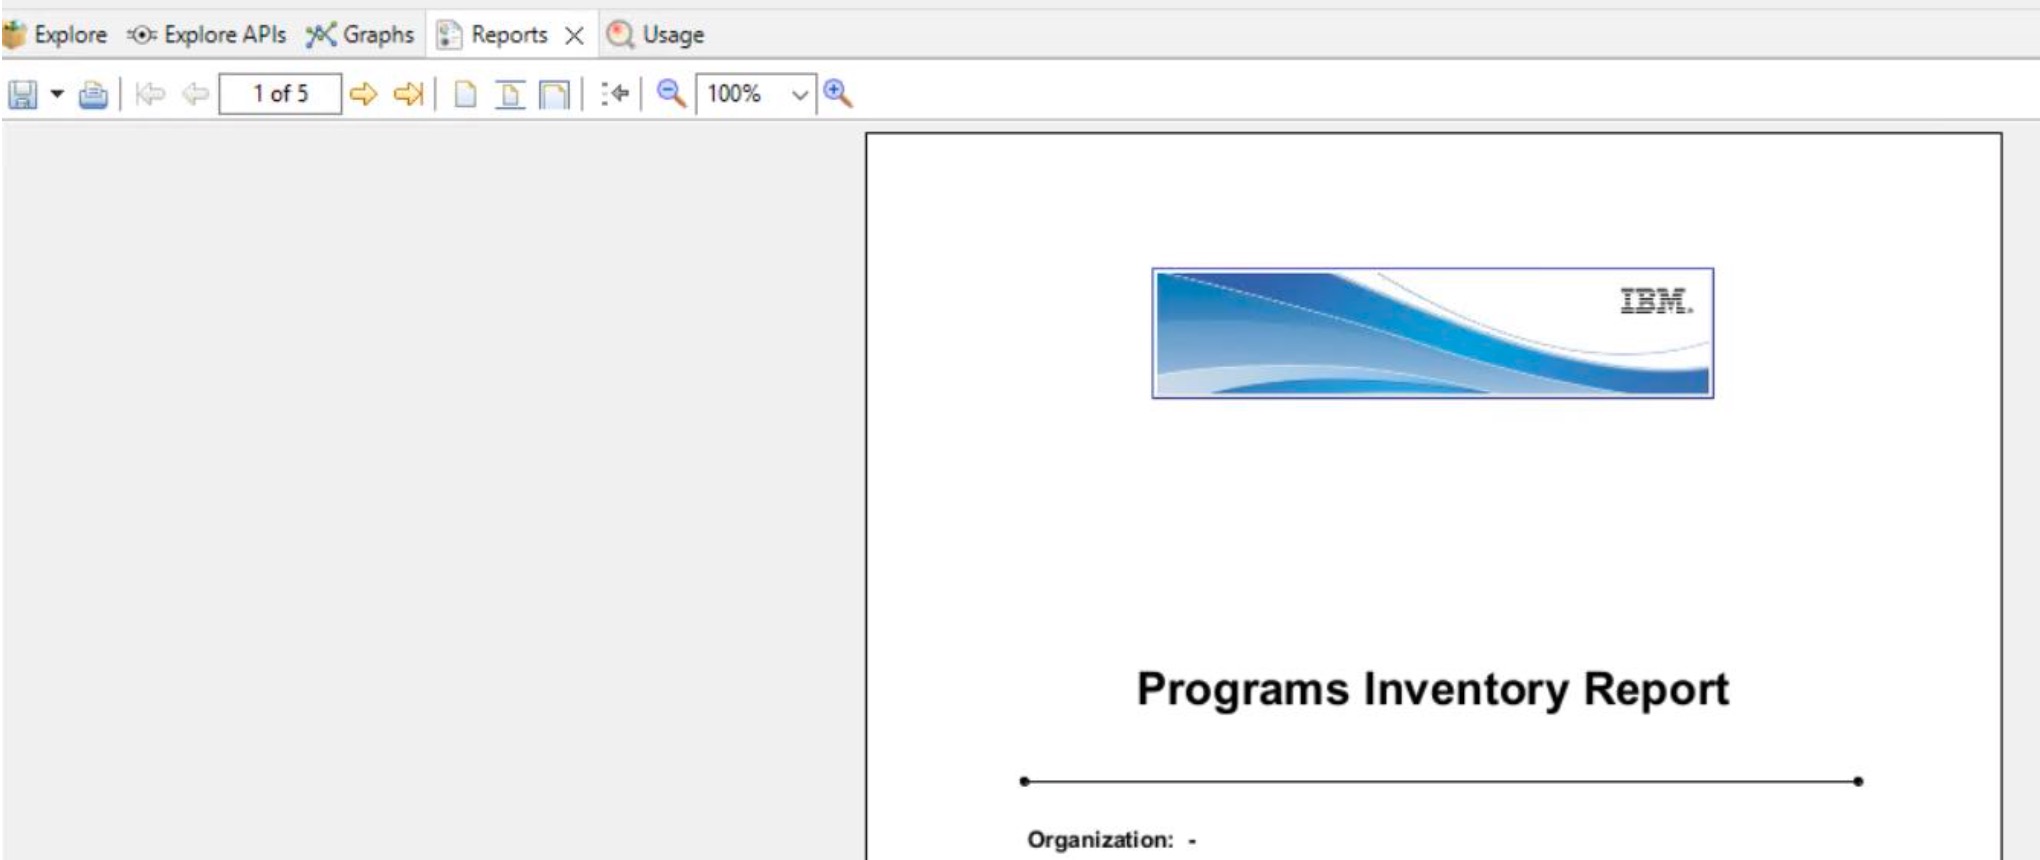
- After the report is successfully displayed, return to the Explore > Explore projects section. Click the sample project, expand Explore in the analysis
list, and select Search in files. Then, in Search in files section, perform a random search based on files content.
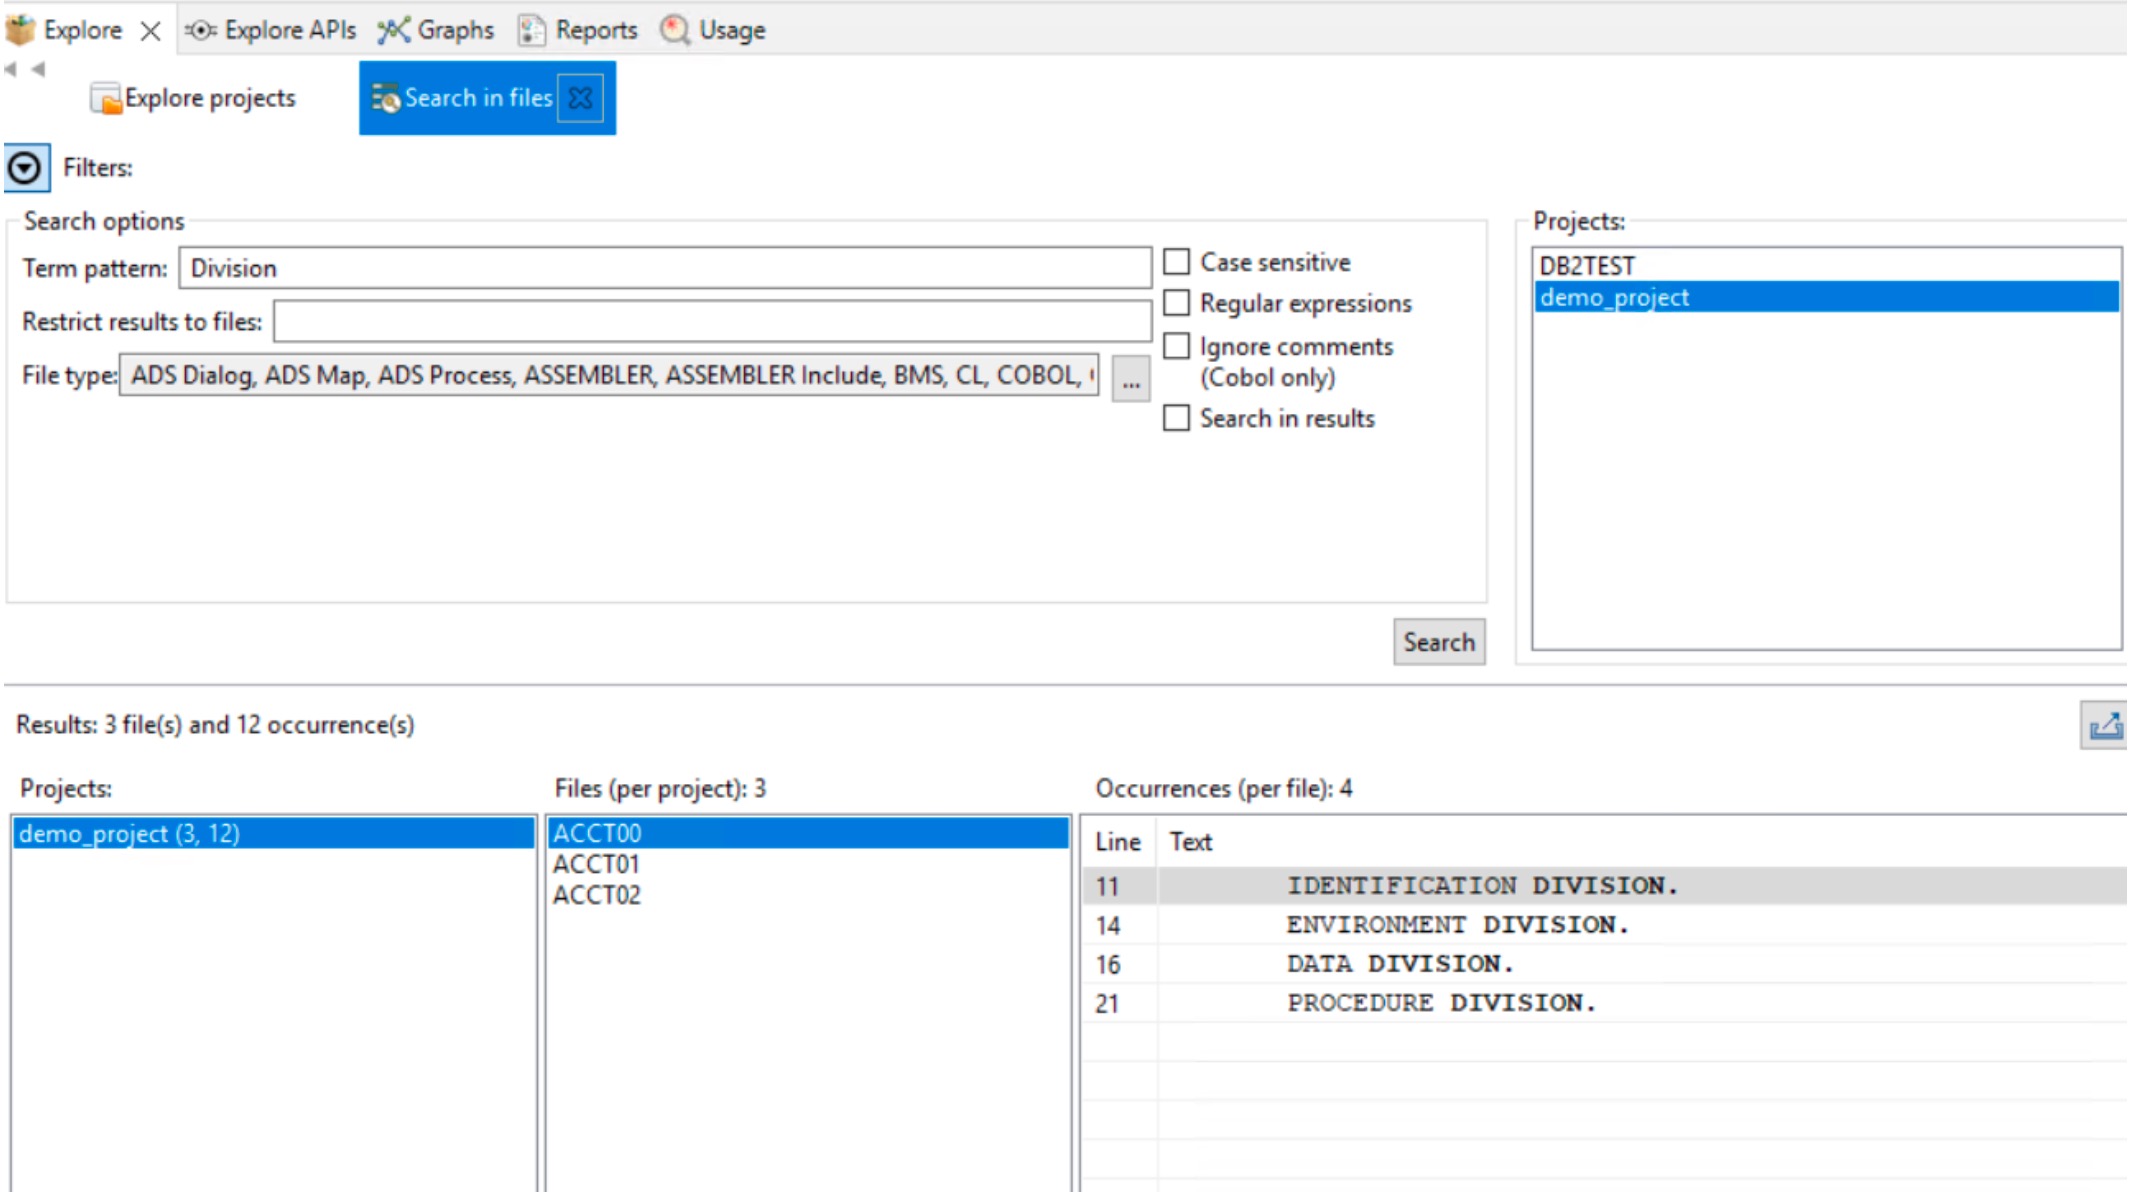
- After the search results are successfully displayed, return to the Explore > Explore projects section. Click the sample project, expand Explore in the
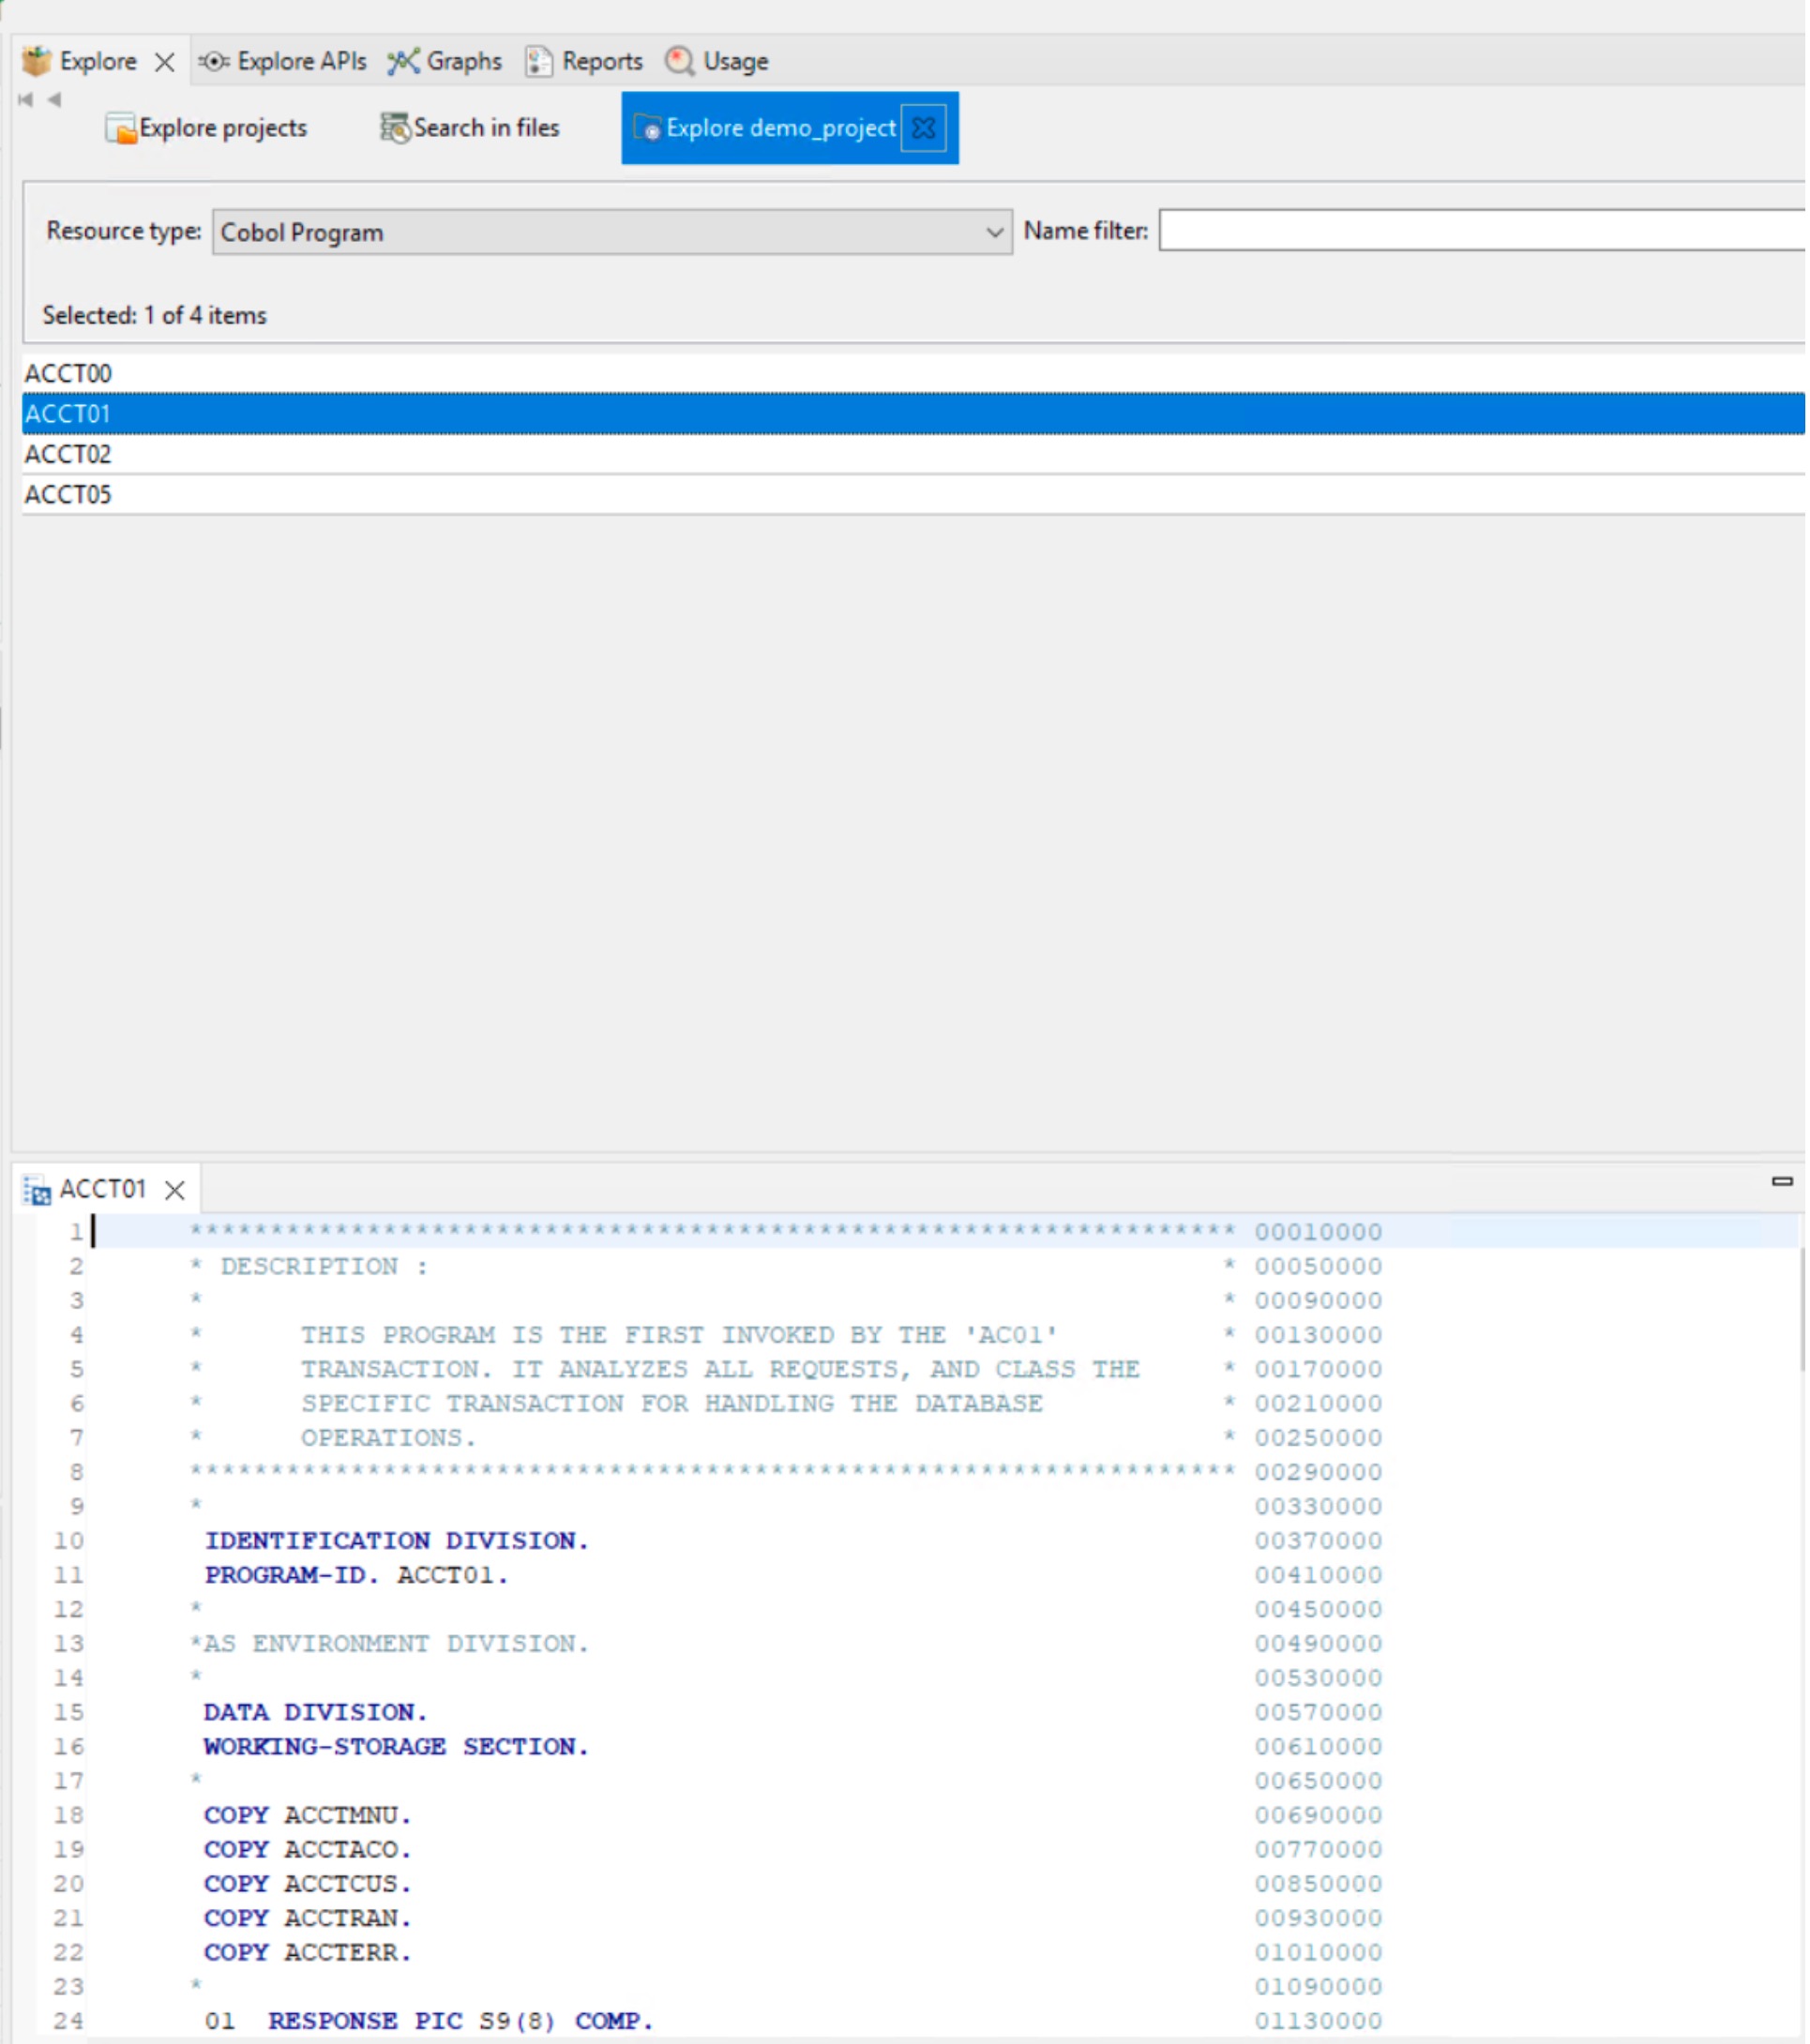
displayed analysis list, and double-click Explore project. Or, double-click the project name in Explore projects section. A new section that is labeled
Explore <PROJECT_NAME> is opened. Then, click the drop-down menu of the Resource type, select one from the list, and double-click it. The source code
file will be displayed in the bottom part of the interface.
- From the same section that you selected the resource type, expand Annotation in the available analysis list, and double-click Add Annotation.
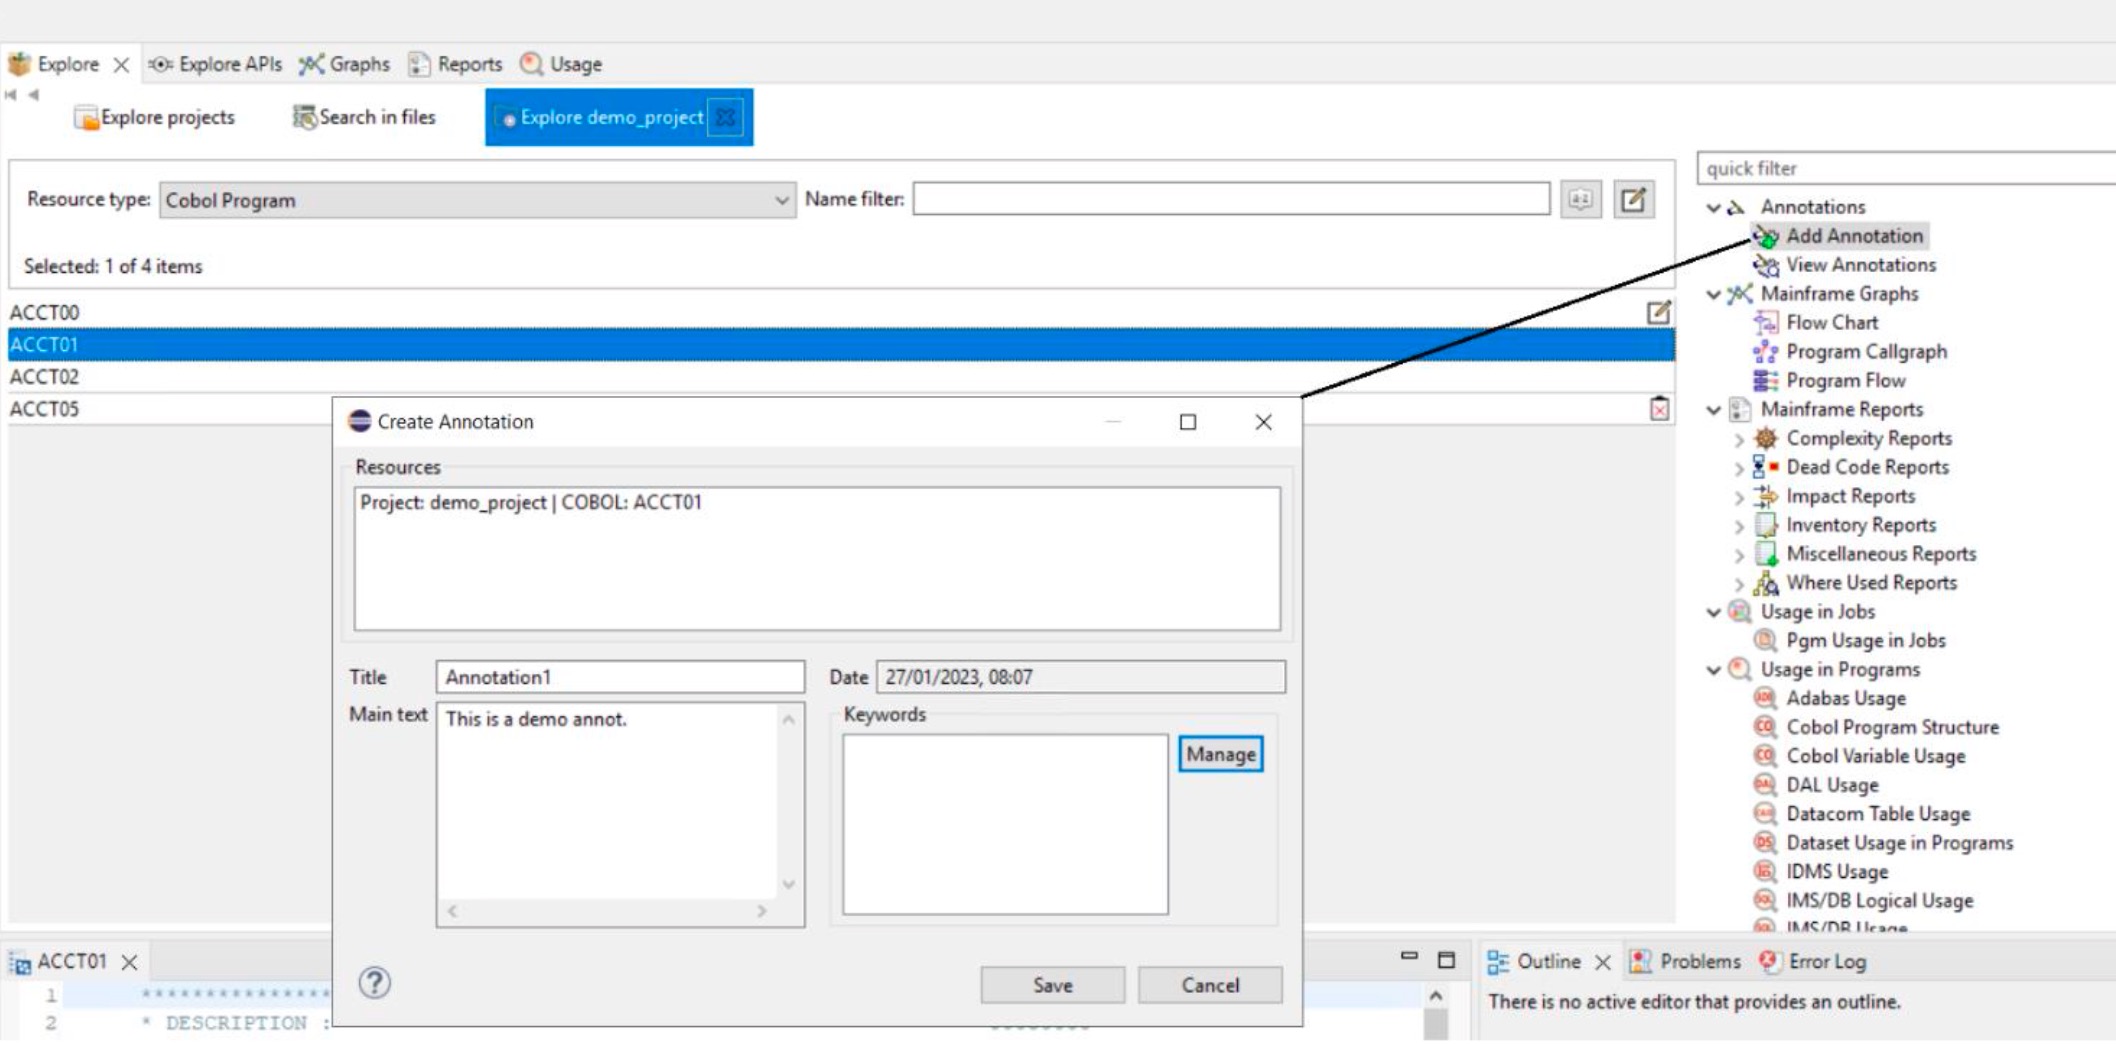
- After the Annotation is successfully added, the check process is complete by using the sample project.